Designing with WordPress ‘intelligently’

How to play to the strengths of WordPress when designing your website.
This article is part of our series on planning your WordPress site. In the first article, we looked at the basics of creating a visual sitemap diagram. And in the following article, we discussed wireframes and started to consider how we would plan a hypothetical ‘About Us’ page that featured individual staff profiles (refer to the previous article if you’re not sure what that means).
In this article, we talk through how we might go about implementing an ‘About Us‘ page that lists out team profiles. However, that’s just an example, we could be discussing products, case studies, white papers or whatever – hopefully, you’ll be able to follow our approach here, and apply it to your own website.
Being Clever
We’ve already identified that our hypothetical website will have an ‘About Us‘ page and on that page, it will show a summary of key company personal. Each person will be clickable, allowing website users to visit specific profile pages for each, individual team member.
As discussed in the previous article, all these team profile pages will share the same overall look and feel. Where every staff profile page has the same layout, but with different content for each team member (e.g. a different photo, person name, job role, contact details etc).
Because of this similarity across team profile pages, we want to be clever with how we implement this in WordPress – because being clever will save us time and effort.
Ideally, we want:
- Current (and future) staff profile pages to have the same design and layout.
- Website admin team able to easily create and update staff profiles.
Let’s see how we can go about achieving those objectives….
Cookie-Cutter
We want to design & fix the layout of these staff profile pages, as that will make things easier to manage. Put another way, if we have 100 staff profile pages, we don’t want to be fiddling around with each one trying to get the photo lined up with the text in a consistent way – what an annoying waste of time that would be!
Instead, what we are looking to do is similar to a cookie-cutter we’d use to cook gingerbread men/women (yum!). Using an appropriate cookie-cutter, it’s then easy to create identical-looking gingerbread people (certainly when compared to trying to make them look the same by hand).

Fig 1 – Cookie cutter
With WordPress, we can implement this ‘cookie-cutter’ approach for our staff profile pages in a variety of ways.
Let’s explore some of these methods so that you are aware of the pros and cons, and you can then apply the approach to your website.
Method 1
In the previous article we created a wireframe* for what information the team profile page will contain, let’s remind ourselves of that:
(Note: *remember, a ‘wireframe’ is NOT a design! It’s more of a schematic sketch of what will go onto a web page).
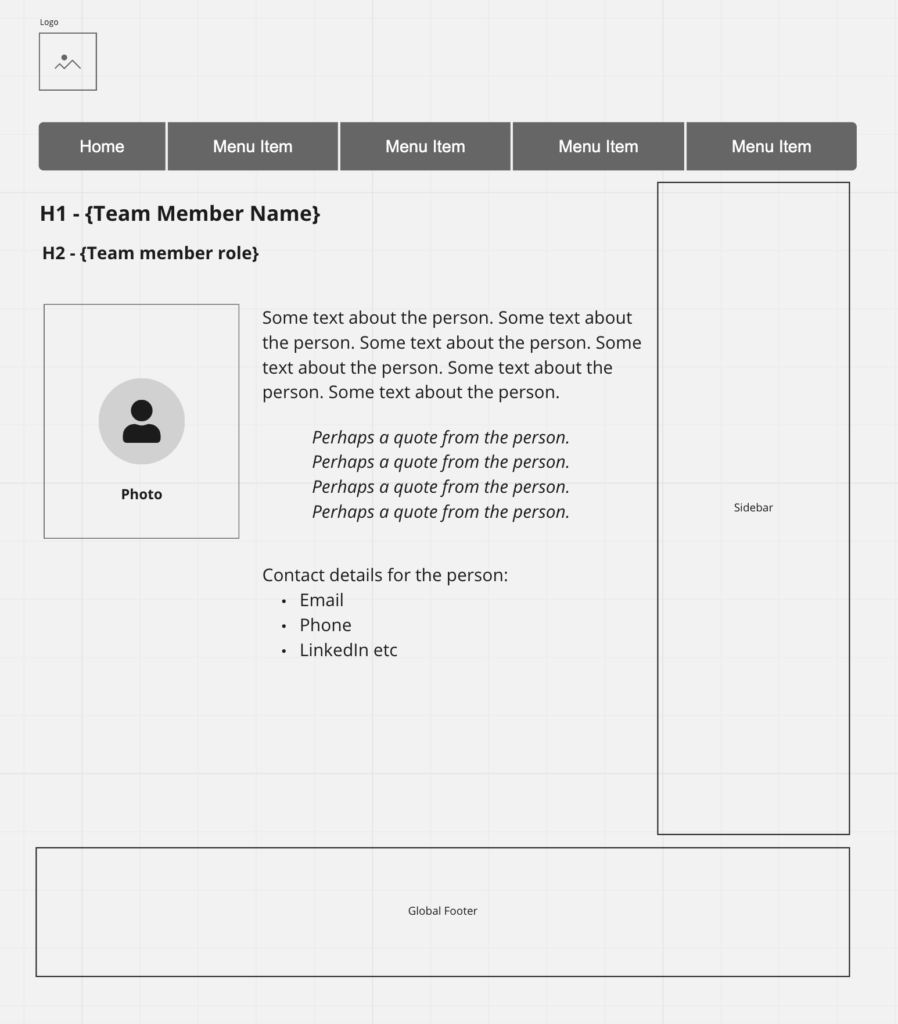
Fig 4 – Wireframe of team member page
As you can see from Fig 4 above, we have obvious bits of content there like the person’s photo, their name, job title etc (I’m sure you could come up with more information, but let’s keep it simple for now).
Let’s now fast forward from this wireframe and assume that your website designer* has created a full design mockup of this page. And, after some rounds of feedback, you decided you were happy with it. The web designer then built the design and put it on a test website for you to review.
(*We’ll say ‘website designer’ here even though, in reality, there may well be multiple roles involved, or indeed a ‘web agency’).
Here, the web designer has essentially just created you a new page to play with, albeit one that has been designed a specific way.
Method 1 – Process
Armed with this freshly built example team profile page, the process for creating team profile pages would be:
- Take a copy of this example team profile page
- Change all the content on the copy page to match the team member you are adding.
- ….then repeat that for every member of your team.
Note: One extra step you’ll also need to do is to make this copy page a child of the existing /about-us/ page. Doing so will make the URL website page address of this new page something like /about-us/joel-hughes/.
But what about the ‘About Us’ page?
When you’ve copied & created all these team profile pages, you now need to go back to your main /about-us/ page and manually add a team summary section which, if you remember from the wireframe we created in the previous article, looks a little like this:
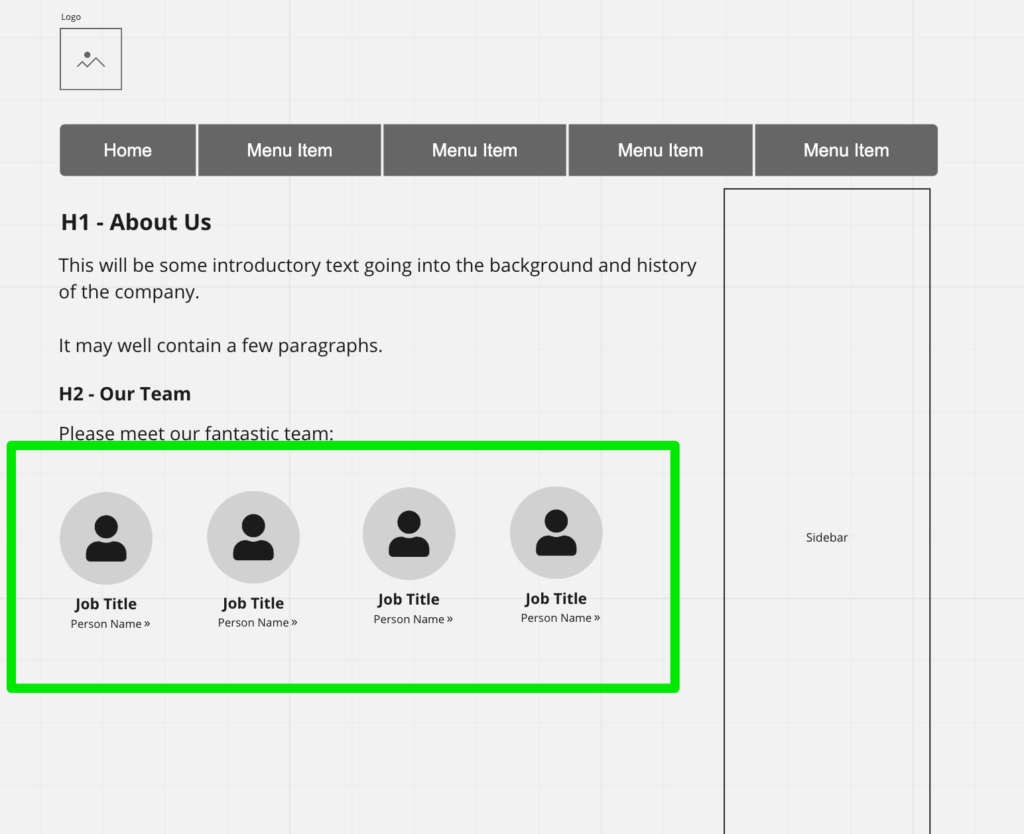
Fig 5 – About Us wireframe
In Fig 5 we are seeing that the page shows a summary of the team (their photo, job title, name) and when clicked, it will go off to their individual page.
As an example of how such a summary can look, let’s see our friend’s website, Climbing Trees >>

Fig 6 – team summary
In Fig 6 we see a nicely designed summary of three team members from Climbing Trees: Alex, Charlie, and Josh. We see their photo, their name, and their job title. You can easily imagine clicking on each to take you to their individual team member page.
Great. So that’s how we want it to look – how do we put that on our ‘About Us’ page?
You now need to amend your ‘about us’ page; adding in a photo, title, and name for each staff member.
Hopefully, your designer has built you something you can easily copy and paste here as you add in each summary. The exact way your designer will have done this will depend on their skills as well as (hopefully!) what is best for you: e.g. Gutenberg, Advanced Custom Field, Elementor etc (don’t worry if those mean nothing to you yet).
That process may or may not be fiddly for you to do; if it is too fiddly, then you want to do one of two things:
- Ask the design to put a more friendly system in place for you
- Get the designer to make any such changes for you (if you have a support agreement in place, this might be easier than trying to do it yourself).
Either way, we are looking at a lot of elbow grease here to manually amend our ‘Abous Us‘ page, so as to put all the details of our team members in there, and linking them to the correct profile pages.
How long?
It certainly won’t take long if you only have three team members (like in Fig 4). But imagine if we’re talking 25 people? Or 1,000! It will quickly become unmanageable.
For the sake of argument, let’s say we have 37 team profiles to add, not an insignificant number, but one that might take you most of a morning to add (if not more).
The problem with the Method 1 approach…
Ok, let’s now explore a scenario that really starts to show ‘Method 1’ in a bad light:
Let’s say that someone suggests you add social media links to each person’s individual team profile page; Facebook, Twitter, LinkedIn, Instagram etc.
That sounds a useful idea, so you collect all the required information from the 37 people (no small task!), and you then go through all of the staff profiles pages, adding in a new section to cover these social media icons, pasting in the links to their profiles etc. It’s a bit fiddly, and it takes you a good while, but you get there in the end, and it looks good. job done.
And then the phone rings. Senior Management Team doesn’t like that idea and says “no”; they don’t mind LinkedIn being there, but not the others as they don’t trust what the team might be saying online (and yes, there is probably a whole book on social media trust issues there!).
So, muggins here (well, you, actually), now has to go back through all the 37 pages and remove everything but LinkedIn. Phoey.
Great. Thanks a bunch.
It’s one thing going through a swathe of pages to make changes, but it’s another to have to undo work you’ve just done!
Not only is that more than a little annoying, but it’s also very time-consuming & very wasteful in terms of how WordPress can operate.
Method 2 – A New Hope
Let’s go back to when we created the design for the /about/joel-hughes/ team profile page (Fig 4).
If you remember we agreed on all the fields and information that would be present, and we agreed on the layout (though we didn’t know about social media icons at this point).
After we are happy with the general design of this staff profile page, we essentially then turned the page into a template* that makes it easier to create new staff profile pages.
Need to add your new team member Jan Doe? Just use the staff profile template, fill in the required fields and the layout of the page will take care of itself (thanks to the template*).
(*template is not strictly the right word here, but it’ll do for now to explain the benefits of what WordPress can do).
Better still, we can code the /about/ page to automagically pull in and display thumbnail summaries of all the team members – no manual work like before. So when we publish new team member Jan Doe, we don’t then have to manually add her to the summary on /about/, that’s done for us. Hopefully, you are now starting to see the power and benefit of well designed & built WordPress pages.
Social Media Situation (Method 2)
Let’s go back to that sticky situation of the social media links we were discussing earlier: you are told to add Twitter, Facebook, LinkedIn, and Instagram to all the existing staff profile pages. Let’s see how your approach will be different now that we are using Method 2, i.e. using a ‘template’.
Firstly, your designer will update the single ‘staff profile’ template that all the staff profile pages inherit from. They amend it to additionally allow the display of the social media icons and links in a certain position in the layout. They also code it to be intelligent so that, for example, if the person does not have a Twitter account, the template doesn’t show the Twitter icon bit on their profile page.
Next, you go off and find out the social media accounts for all your team, in readiness to adding them to the site.
Then comes the manual work of going back through all the team profile pages, and adding in any social media accounts each team member has (though this time, it’s a little easier to do this in the backend of WordPress, as we’ve structured the fields better (separating the data from the design).
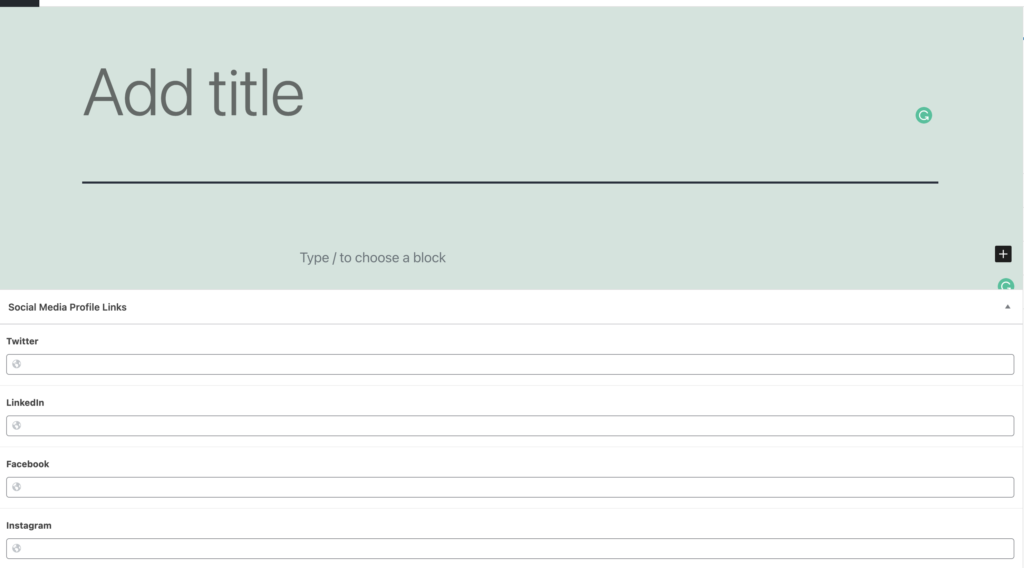
Fig. 7 – Example of how custom fields (e.g. social media links) can appear
In Fig 7 above, we see how your designer might implement these social media links as custom fields in the backend of your WordPres site, which you would see when editing (for example) a Page. These custom fields sit outside of the main editor*.
*Note: the editor above you may recognise as Gutenberg. The custom fields you see at the bottom can also be integrated into Gutenberg blocks, but I shall leave that for another post. The sharp-eyed amongst you might also know that there already is a Gutenberg block for social media icons; that’s fine – that’s not really the point here, we’re just trying to set the case out for custom fields.
As you supply the relevant social media links per team member into the backend admin area of the website, the social media links appear on their frontend profile pages. Magic!
However, the phone rings, senior management says no, we’ll only allow people’s LinkedIn addresses there.
Method 2 saves the day…
If you remember, with Method 1, to comply with this request from senior management, you had to go back through all 37 profiles and undo your work. It’s fiddly and time-consuming to go through all the pages; and if you miss one, someone will be sure to point it out!
However, because we are now using a template, the situation is much easier! All we now do is get our designer to amend the team profile template, removing all social networks aside from LinkedIn. That simple change then immediately affects all 37 profile pages. A big change was done in the fraction of the time it would have to manually amend the pages, all because we thought it through, and better organised how we stored and organised the information on our WordPress site.
The End
Hopefully, this article has laid the seeds for how you look at the content on your WordPress website. Helping you break free of just ‘copy and pasting‘ WordPress pages when there are many more intelligent ways of organising the information on your website. Ways that will help you (as website admin) as well as your online visitors, and Google.
We shall evolve this topic further in subsequent articles.